Aiming to produce high quality output is a persistent goal here at AccuPixel. We use high end DSLR cameras for both terrestrial and underwater work and the drone is very much intended to produce images suitable for high accuracy photogrammetry. The GoPro and Mavic Drone are cost-efficient tools that assist in creating photogrammetry.
But at the same time we are aware that image quality is rising whilst the cost of equipment falls. Using “cheap” kit always requires caution and validation. However, what if we can work within its limits to produce output that fits the purpose?
Sample Data
We were contacted by Chris Goddard of Collision Science and offered a couple of sample datasets created by low cost kit – A GoPro action camera and DJI Mavic Mini drone.
On the face of it, neither camera would be near top of a “recommended” list. Both have inherent design features that do not suit accurate photogrammetry.
But would they deliver a result? And would the advantages of recursive optimisation and scaling in Metashape Pro refine the output and could we hold a tolerable level of accuracy?
GoPro for Photogrammetry
We are big fans of camera poles. Raising any camera increases coverage and can help with overlap, as well as the obvious advantage of covering anything that is beyond arm length.
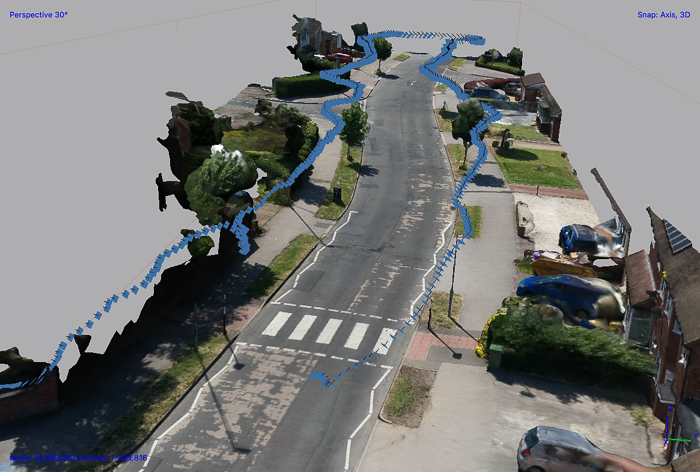
We walked the scene with the GoPro mounted on a pole, capturing 463 images in four minutes. After performing the initial alignment and camera optimization, we used the distance cones placed in the scene to apply scaling. Although we do not recommend using short distances to constrain a large model, the fixed/known values were better than nothing.
After final optimisation we added a check bar – to confirm distance rather than constrain the model – and variance over 20m was just 20mm.
During image capture cars – moving objects – had transited the scene. The ortho photo needed a little patching work to remove the transitory elements. We would expect this regardless of the capture tool. With over 400 images to choose from, finding suitable replacements was easy.
The Results of GoPro Photogrammetry
The resulting ortho photo (one of the outputs available from Metashape Pro) was reporting a scale of 2.49mm per pixel, a very good level of detail. The 1.2Gb tiff output isn’t directly viewable on the web, but our friends at Dronelab have sorted that. Here’s the ortho photo – be sure to zoom in:
At certain points the camera pole appears as a repeating feature. This is almost certainly down to technique and is a straightforward correction. Again, you can use the ortho photo patching tool to remove them.
During the investigation Chris used the point cloud output from Metashape to analyse the incident in PC-Crash:
Overall, we would have preferred to see constraints over the entire scene, and better still if accurate ground control points were placed and measured with GPS to give geo location. Care needs to be taken when working quickly with small CMOS sensor cameras and the quality of resulting images must be preserved. In this well lit scene the GoPro had little difficulty achieving low noise blur free images.
In the conditions the results were impressive and outputs more than fit for purpose.
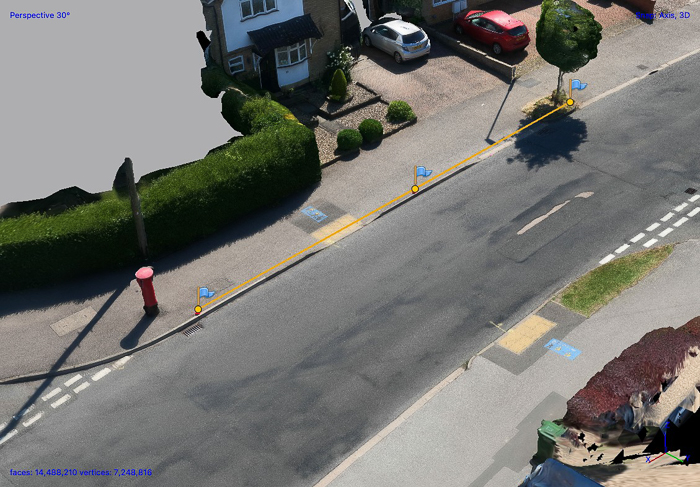
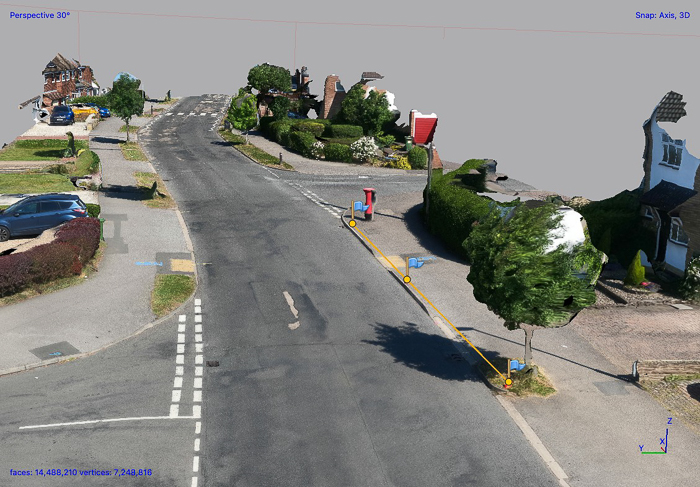
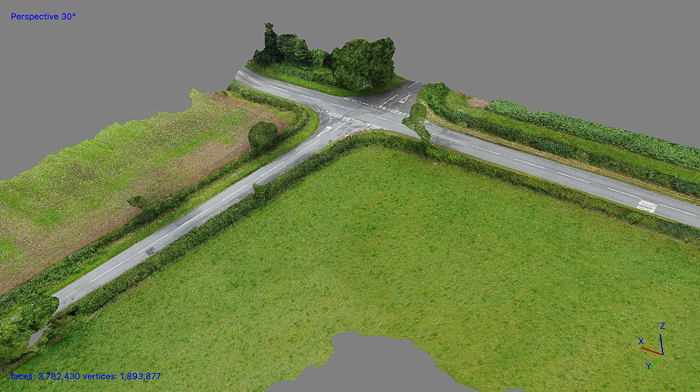
Mavic Mini Drone and Photogrammetry
A short flight had captured 142 images of a road junction.
All drone images will contain location data – latitude, longitude and altitude – embedded in the jpeg files. We did not expect accurate GPS data from the Mavic Mini Drone and were not surprised to find the accuracy was merely approximate. We could not use the GPS values gathered for reconstruction.
After initial alignment optimisation started to refine alignment. Although GPS was of little value we can still apply constraints, adding scale bars before final optimisation, using the markers placed into the scene to fix known dimensions.
Again, using a small CMOS sensor we must be mindful of light levels, ensuring quality of images are consistently high for photogrammetry. And like the GoPro scene adding control points would have delivered accuracy over greater distances and geo location.
Scale bar errors remained within an acceptable limit – just 90mm over 50m.
The ortho photo scale delivered 12.6mm per pixel, which differed slightly from the GoPro-derived images. We can further improve this scale if we need higher resolution. Hosting of the ortho photo again is by Dronelab:
For all its limitations the Mavic Mini has one advantage – its takeoff weight puts it in the lowest risk drone category. This means that we can deploy it in areas where heavier drones would require significant risk mitigation.
Summary of GoPro and Mavic Drone Photogrammetry
Neither model could be geo located or referenced but local scaling was within reasonable and usable tolerances. Are we surprised? Yes, but then again we do frequently remind ourselves and clients of a simple mantra when capturing and processing 3D data;
Will the outputs fit the purpose and meet client requirements?
One positive benefit is keeping time at-scene to a minimum. A laser scanner would have taken far longer than the four minutes the GoPro walk around took.
Would we use this kit for every instance?
No, not at all. But if the client requirements fit then cost effective hardware – used within its recognised limits – will deliver. Thanks for reading about GoPro and Mavic Drone Photogrammetry!